
Package stickers do more than close a box. They can identify your brand, protect a simple mailer, and give customers a reason to remember the unboxing. But a sticker that looks beautiful on a screen may peel from a chilled jar or wrinkle across a kraft-paper seam. Small details matter.
Choosing well starts with the package itself. Consider its material, shape, storage conditions, and how customers open it. A paper label may suit dry cartons, while a waterproof film can work better for products exposed to moisture. Check adhesive strength, finish, print readability, and whether the sticker can be applied by hand or machine. Measure the available space before ordering; a design that crowds the logo or covers useful product information often feels less polished. Test a sample on the actual package. Then leave it overnight, or longer if shipping conditions demand it. Real handling reveals flaws.
Budget and brand fit matter, too. Compare unit cost at different quantities, but do not choose solely by the lowest quote. Ask suppliers about material specifications, proofing, and expected production times. A matte finish can feel understated; gloss may make colors pop, yet show fingerprints. There is no universal best choice. Even careful testing cannot predict every customer’s experience, so gather feedback and revise when needed. The right Package Stickers balance appearance, performance, and practical cost. Start with a small run if you are unsure. A little hesitation can save waste.
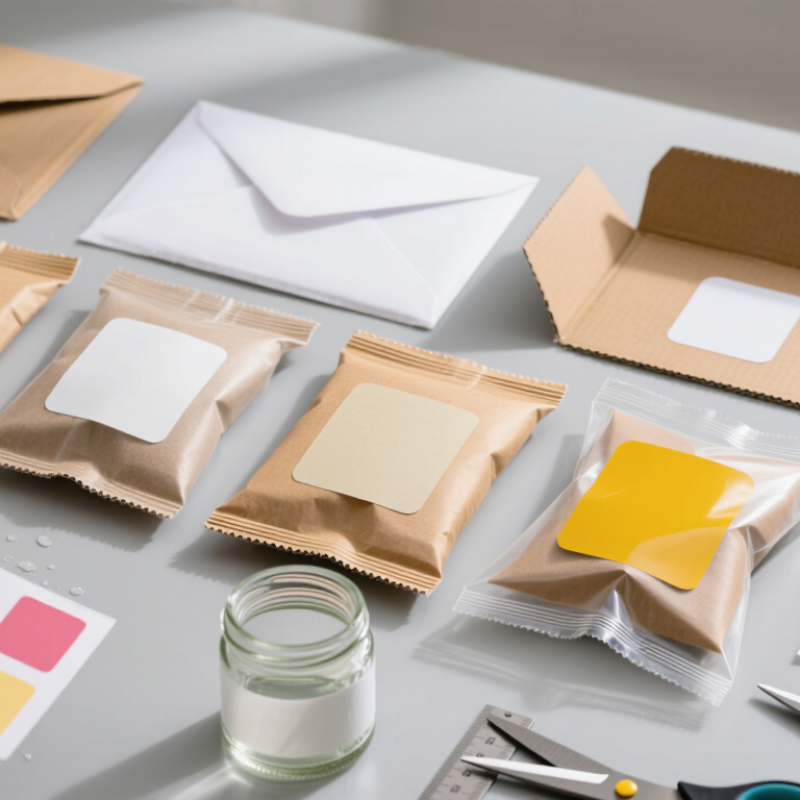
A package sticker should have a clear job: identify the product, protect a seal, share handling details, or make a parcel feel personal. Choose the job before choosing the shape. A 50-millimetre label on a kraft mailer can carry a return address and reinforce a tidy, deliberate presentation. A small seal across a box flap can show whether it has been opened. One sticker rarely does everything well.
Material and placement affect whether the sticker performs. Test it on the actual box, pouch, or jar; cold surfaces, dust, and textured paper can weaken adhesion. The 2020 report Sustainability in Packaging: Inside the Minds of US Consumers found that 60–70% of surveyed consumers were willing to pay more for sustainable packaging. That does not mean every sticker needs a sustainability claim. It does mean material choice deserves attention, and claims should match what the packaging can genuinely support. Small, but visible.
A 2016 eCommerce Packaging Study reported that 40% of respondents were more likely to repurchase after receiving premium packaging, while 50% were more likely to recommend a retailer with branded packaging. A sticker can contribute to that experience, but it cannot rescue a crushed box or confusing instructions. I’ve seen teams focus on artwork and overlook placement; the result looked polished, yet covered useful product information. Check readability, adhesion, and the unboxing experience with real samples before ordering at scale.
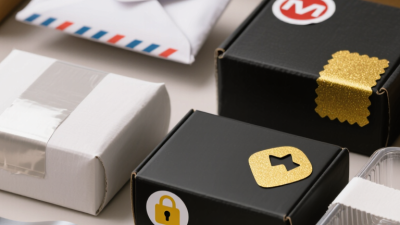
Choose materials and adhesives for the surface, storage conditions, and handling your product will face. A paper label suits a dry carton or jar. For a chilled bottle, a moisture-resistant film may hold up better. Check the package surface, too: textured cardboard, flexible pouches, and smooth glass need different adhesive performance.
Match adhesive to the application. Permanent acrylic adhesives often suit products exposed to changing temperatures, while removable adhesives help with temporary labels. Always test on the actual package. Apply a sample to a clean surface, chill or warm it as needed, then check the edges and removal. Small details matter. The U.S. EPA’s 2018 Advancing Sustainable Materials Management report found recycling rates of 68.2% for paper and paperboard and 8.7% for plastics overall. These figures cover broad material categories, not labels alone, but they support checking whether label stock fits the package’s intended recycling pathway.
Tips: Test labels after application, not just straight from the roll. Try a damp bottle, a cold carton, or a pouch squeezed during shipping. Record the surface temperature and wait time. A quick test can miss problems that appear after a day. Recheck the choice when suppliers, packaging, or storage conditions change.
Sticker size should fit the package, not dominate it. Measure a flat area away from seams, folds, and opening tabs. A 2-by-3-inch label may suit a small mailer, while a jar often needs a narrower shape that follows its curve. Leave a visible border around the sticker so it does not look squeezed against an edge. Check the actual package, too; dimensions on a screen can be misleading.
Shape affects both appearance and application. Rounded corners are less likely to lift during handling, while a circle can draw attention to a short message. Keep the shape simple if staff apply labels by hand. Small details slow the process. For visual design, give the business name or key message the strongest contrast and use supporting text sparingly. At arm’s length, the words should still be readable. Test a printed sample under ordinary packing-room light, then place it on a filled package. One design choice may look elegant on paper but become crowded on a curved surface. I would revise it, even if the first version felt finished. A slightly imperfect test label can reveal more than another hour spent adjusting a screen mockup.
Plan sticker size, shape, and visual design around the available packaging surface. These example dimensions are practical starting points, not industry averages.
Measure the flat, visible area before ordering. Keep stickers clear of seams, openings, and required shipping information, and test a sample on the actual package. Choose a shape that fits the surface and a high-contrast design that remains readable at a glance.
When choosing package stickers, inspect a physical proof under the lighting where orders are packed. Small type can look crisp on screen but blur in print. Check that fine lines stay clean and colors remain readable against the sticker material. Ask for a sample run, not just a digital preview. It can reveal problems early.
Test the adhesive on your actual packaging. A sticker that holds well on smooth glass may lift from recycled paper or a textured mailer. Press one onto a clean box, then check it after a day and after handling. Does an edge curl? Does the label tear when removed? These small tests matter. Small details count. Temperature and moisture can affect adhesive performance, so test near your storage and shipping conditions.
Match the sticker size to its job. A seal needs enough width to bridge an opening, while a product label should leave key details easy to see. If it includes a barcode, print it at the intended size and scan several samples. Not every proof will catch a problem. I once focused too much on color and missed how slowly a tiny label peeled from its backing. That was an annoying, useful lesson. Confirm roll direction, core size, and printer compatibility before ordering; otherwise, good stickers may not fit your workflow.
Compare sticker suppliers using the same specification: finished size, material, adhesive, finish, core size, and delivery location. Ask for quotes at three quantities, such as 500, 2,000, and 5,000 stickers. Include setup charges, die costs, shipping, and any proofing fees. A low unit price can hide a costly setup fee. Check samples on your actual mailer or box; a label that lifts from a curved surface can waste an entire batch.
Order size matters. Small runs reduce storage and design risk, but often cost more per sticker. Larger runs can lower unit cost while tying up cash and risking outdated artwork. Request the supplier’s production tolerances and lead time, then compare the delivered cost per usable sticker—not just the printed price. Keep a small buffer for damaged labels. Not too large.
Material choices deserve scrutiny. The U.S. Environmental Protection Agency’s 2018 materials report, published in 2020, estimates that packaging and containers made up 82.2 million tons, or 28.1%, of U.S. municipal solid waste. That figure is not specific to stickers, but it highlights why asking about liner waste and recyclable material options is worthwhile. Compare those claims with written specifications; “eco-friendly” alone tells you little. A practical first order is a test batch, even when the unit price stings.
| Supplier Type | Typical Minimum Order | Indicative Unit Cost | Setup or Artwork Costs | Typical Lead Time | Best For | What to Check |
|---|---|---|---|---|---|---|
| Online digital-print supplier | About 50–100 stickers |
100: $0.25–$0.60 each 500: $0.08–$0.22 each |
Often no setup fee for print-ready files; design help may cost extra. | About 5–10 business days after proof approval | Small launches, seasonal packaging, and testing a design before committing to a large run. | Order format, proof process, material options, and whether shipping is included in the quote. |
| Local print shop | Often 100–250 stickers; ask about short-run options |
100: about $0.30–$0.80 each 500: about $0.10–$0.30 each |
May include prepress in the quote; artwork corrections or design services can add cost. | About 3–10 business days, depending on workload and materials | Businesses that want in-person help, a physical proof, or convenient local pickup. | Color matching, print method, proof charges, and the price difference between pickup and delivery. |
| Wholesale or volume-focused printer | Usually 1,000 or more stickers |
1,000: about $0.04–$0.12 each 5,000: about $0.02–$0.07 each |
Setup or plate charges may apply, especially for some print methods or custom specifications. | About 1–3 weeks, including production and shipping | Regular packaging runs where lower per-sticker costs matter more than ordering small quantities. | Storage needs, overrun or underrun allowance, reorder pricing, and total delivered cost. |
| Roll-label specialist | Commonly 250–1,000 labels, depending on roll format |
500: about $0.06–$0.20 each 1,000: about $0.03–$0.12 each |
Custom sizing or finishing may affect setup costs; confirm whether artwork checks are included. | About 1–3 weeks | Fast, repeated application to jars, boxes, bottles, or other packaging lines. | Core size, winding direction, label gap, roll diameter, and compatibility with your dispenser. |
| Short-run specialty printer | About 50–250 stickers |
100: about $0.40–$1.00 each 500: about $0.15–$0.45 each |
Custom finishes, special materials, or complex cutting can increase setup and production costs. | About 1–3 weeks | Premium packaging, unusual shapes, small batches, or specialty finishes. | Durability, finish samples, color reproduction, and whether the quoted price includes custom cutting. |
Buying tip: Compare the total delivered cost—not just the unit price—and request a physical sample when material, color, or finish is important. For packaging exposed to moisture, oils, or refrigeration, ask whether a suitable film material and adhesive are available.